

Next week is Thanksgiving and while some of it is about making food, another part is decorating. This is a super easy and fun pumpkin garland that we made at MOPS. It was a huge hit! The cost is very minimal and wouldn’t cost anything if you already have some scrap paper and a couple yards of ribbon or twine laying around the house. Target often has 20+yards of twine in their dollar bin, so I pick it up every once in a while.
The paper I used was cardstock and scrapbook paper. You could use photographs, old Christmas cards, blank paper the kids have colored – or anything you can cut!

One mom had a FABulous idea: take the garland and then put a grandchild’s photo in the middle of each pumpkin. It will be their gift for Thanksgiving.
Another idea: have the kids write what they are thankful for on each oval.
Pumpkin Garland Craft
Supplies needed:
9-10 sheets of cardstock or scrapbook paper for the pumpkins
1 sheet of brown cardstock or paper for the stems
7 feet of ribbon or twine
Hole punch
Scissors
Glue stick or 1/4″ foam adhesive squares
Here is a photo of the foam adhesive squares:

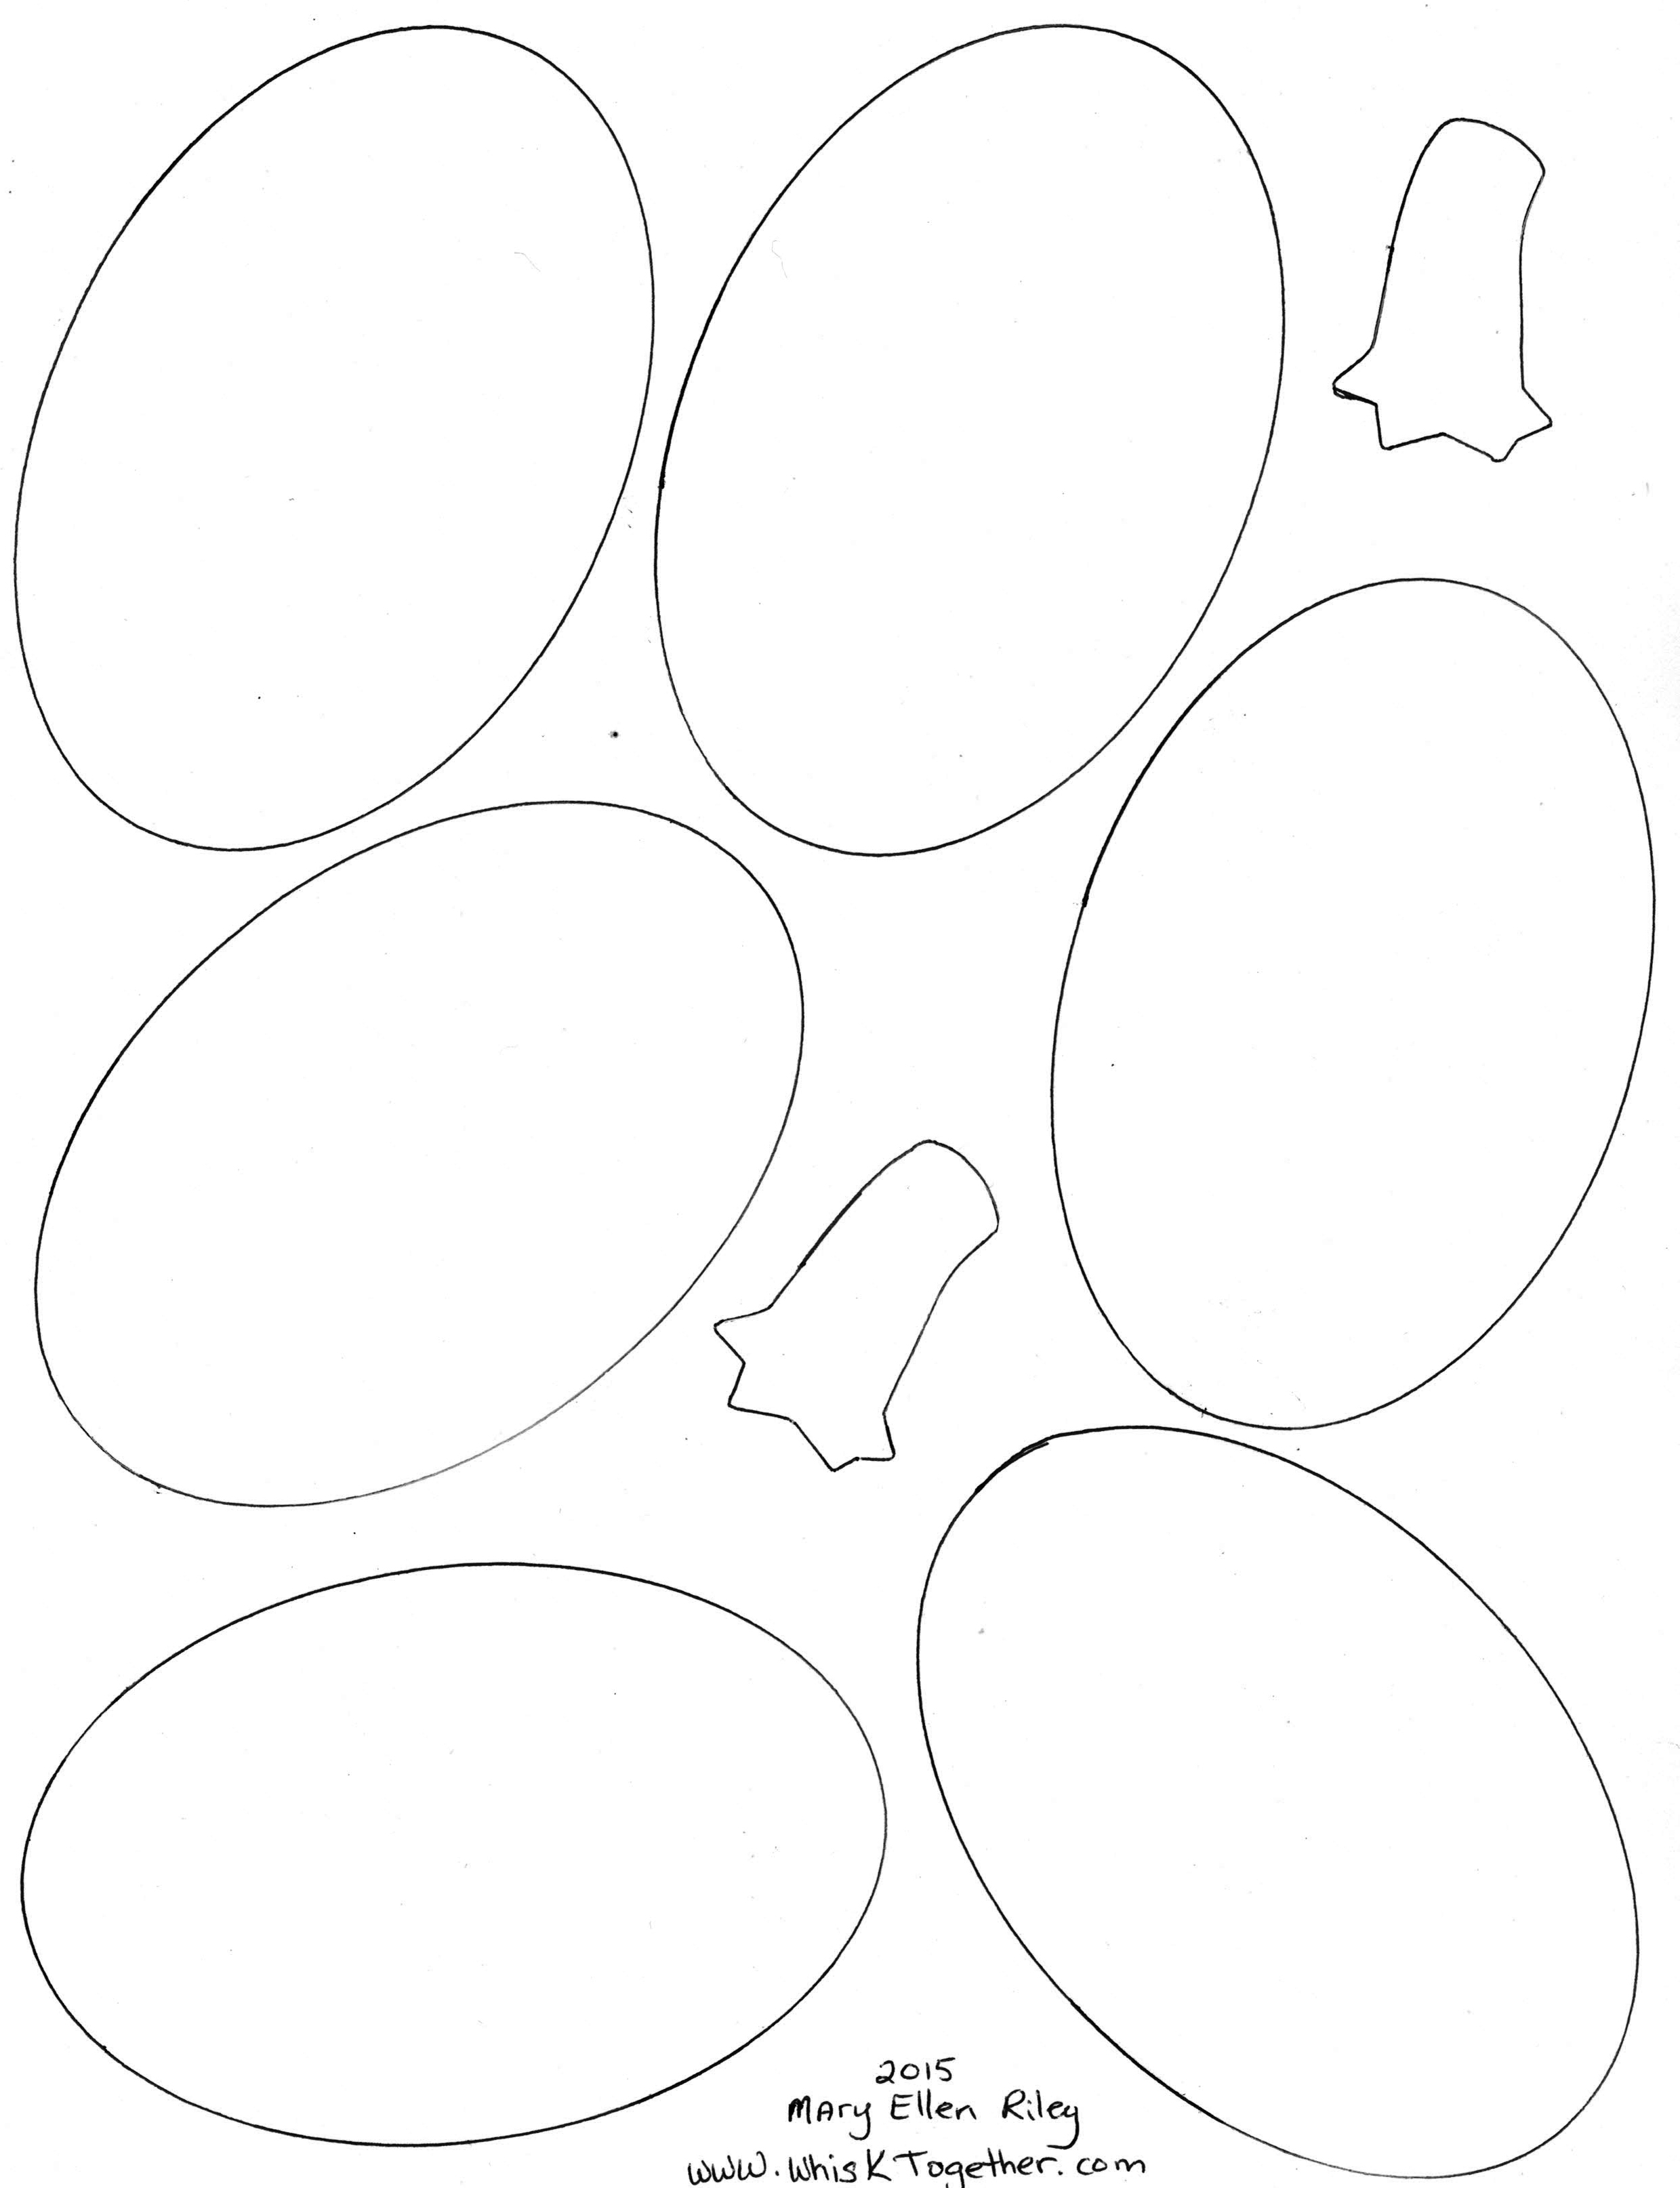
1. Print out the template onto the paper you want to make the pumpkins.
Template:

Alternatively, just print the sheet on normal copy paper and use it to trace the ovals. You may want to make just one set of templates from cardstock so that you can trace them on a variety of sheets of paper.
How many do you need? My fireplace is about 6 feet wide. I needed 8 pumpkins with 3 ovals each. That is 24 ovals each. If you want the pumpkins different in the middle like I did, you need 8 ovals of different paper and 16 ovals of orange cardstock.
Or, you could make a 4 oval pumpkin too. The choices are endless!
2. Cut out the ovals. Use the stem to cut the stem out of brown cardstock.

3. Assemble the pumpkins as shown overlapping them. I have seem them made with the top coming together as shown. I also saw examples of the pumpkin straight across. It is all in your preference.
Glue with glue stick or or foam adhesive.

4. Attach stems with glue stick.
5. Punch a hole on either side of the pumpkin with a hole puncher.
6. Thread the ribbon or twine through the pumpkins. Hang up on a fireplace, blank wall or above an entryway!


