In honor of having my Fold and Go Organizer on Money Saving Mom, here is another step by step craft. Crayon rolls are rather inexpensive to make, but they can be life savers when collecting all those crayons from restaurants or keeping children’s crayons together in the car. It makes a nice gift for any child’s occasion and I love how you can pick the fabric just for the child. I saw that since our Walmart removed their fabric section, they have now inserted a small pre-cut section of fabrics like Cars 2, Tangled, etc. I can’t wait make a Cars 2 crayon roll!
Crayon Roll
yield 1
Use 1/4″ seam allowance
Ingredients:
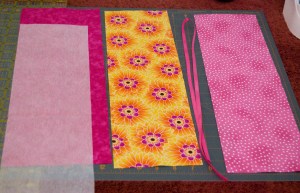
2 pieces of fabric: 5″x16.5″ (for the outside and inside)
1 piece of fabric: 6″x16.5″ (for the pocket), folded in half lengthwise and pressed
1 piece of light fusible interfacing
30″ piece of ribbon
15 or 16 crayons
Directions:
1. Iron interfacing to the wrong side of the “Inside” Fabric piece. This piece is one of your 5″x16.5″ pieces. My interfacing directions state to blot with a damp cloth and then iron.

2. Place Pocket Fabric (that is already folded in half lengthwise and pressed) on top of Inside Fabric. Both pieces are Right Side Up. Line up the bottom edges. Pin together
3. Starting at one end, sew 1.5″ from edge to top of pocket. After that, sew lines 1″ apart. You can use a dressmaking pencil or I like to put a piece of Scotch tape on my sewing machine to make the 1″ mark. Sew 14 lines. Measure 1.5″ from the last line and cut the remaining fabric off. **The original directions for this craft have me sew 15 lines, but every time I did that the last crayon pocket would be off, so instead I just sew 14 lines and measure and cut to make sure it is right. Since then, my pockets have been 100% correct.
4. Trim off all those threads! Fold the 30″ piece of ribbon in half and pin to the right side of the Pocket/Inside Fabric. The top of the pocket is usually the middle for me. Pin remaining Outside Fabric (5″x16.5″) to the Pocket/Inside Fabric Right Sides together. Make sure the ribbon is in the middle, so it doesn’t get caught in the seams.
5. Be sure that when you sew, you leave a 3″ gap somewhere. This is where you will turn it inside out. I usually mark this on the wrong side of the Outside Fabric to make sure I don’t sew any further. Sew with 1/4″ seam allowance around the edges.
6. Turn the crayon roll right-side out. Feel free to use a dull pencil or blunt tip to make your corners turn out better.
7. Topstitch all the way around the crayon roll. Be sure to catch all the layers in the 3″ gap that was created earlier.
8. Press if needed. And insert crayons!


Someone made one of these for my daughter and I LOVE it!!! Thanks for showing how to make it I was trying to figure it out!! 🙂
InteractiveOnline Tampa FL Web Design Contract
How to make a Crayon Roll